Table of Contents
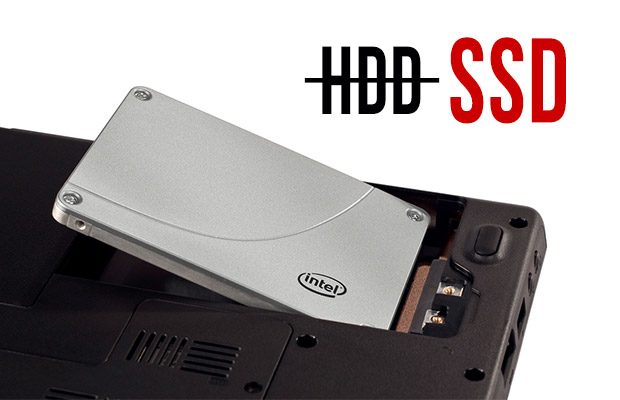
In this post we’re goign to talk about HDDs, SSDs and how to replace the formers with the latters in your laptop (ultrabook or not, that doesn’t matter much).
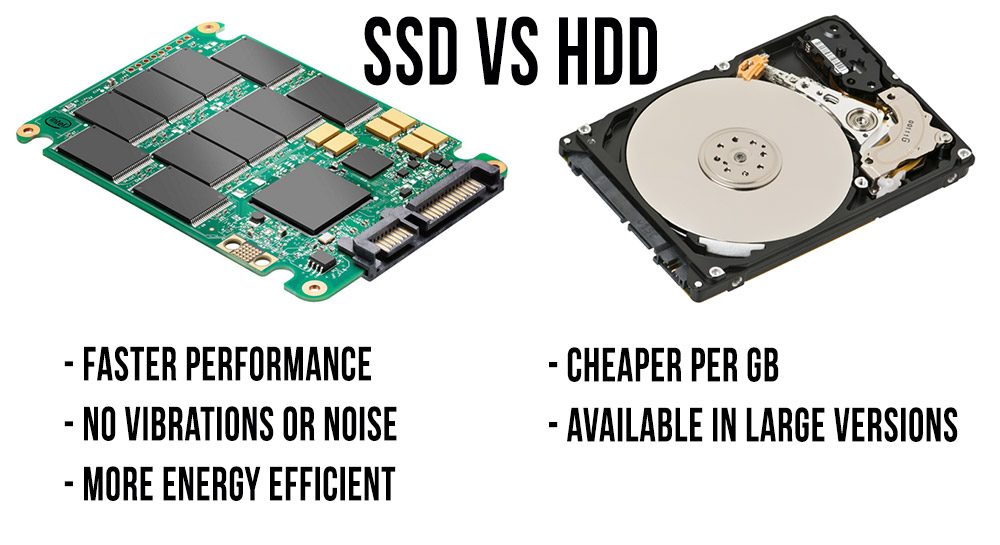
The HDD is in most cases the slowest component inside a modern laptop. That’s a known fact. Replacing it with an SSD will greatly improve the device’s responsiveness and overall performance. In fact, an SSD will speed up every action that requires disk access. Windows will boot faster, apps will load quicker and installing programs or copying files is going to take far less time than before. And that’s not all. SSDs run silent, while HDDs have moving parts that produce noise/vibrations and they tend to require less energy than HDDs, thus have a slight impact on battery life.
On the other hand, SSDs are more expensive per Gigabyte than a HDD and are available in smaller capacities (up to 1 TB at the time of this post), but these are the only things one could complain about them. Older SSDs were also somewhat unreliable and had a tendency to break after a given number of read/write cycles, but that’s not the case anymore. This post tells you more about the differences between SSDs and HDDs today.
Now, most affordable laptops ship with 2.5 inch standard HDDs. Some also get a small amount of cache SSDs (usually an mSATA 8 to 32 GB stick), used to speed up certain operations, but most rely solely on a HDD. In my reviews I recommend upgrading the HDD to a compatible SSD if the budget allows, no matter of the existing caching SSD, and that’s usually fairly simple to do.
However, here’s what you should know before reading further:
- Some manufacturers will consider the warranty voided if you try to exchange the HDD. At the same time some will put a warranty sticker on one of the HDDs screws just to prevent you from performing this upgrade and damaging your laptop, in case you don’t know what you’re doing.
- This post is meant to help, but I can’t be hold accountable in any way in case you mess things up. So if you think this upgrade is out of your league, go to a specialized service and pay them to do the swap.
If you’re fine with these, it’s time to prepare your tools. You’ll mostly need a screwdriver with the right heads (Philips and Torx sets are usually enough), but a plastic knife might come in handy too, as well as an antistatic wristband.
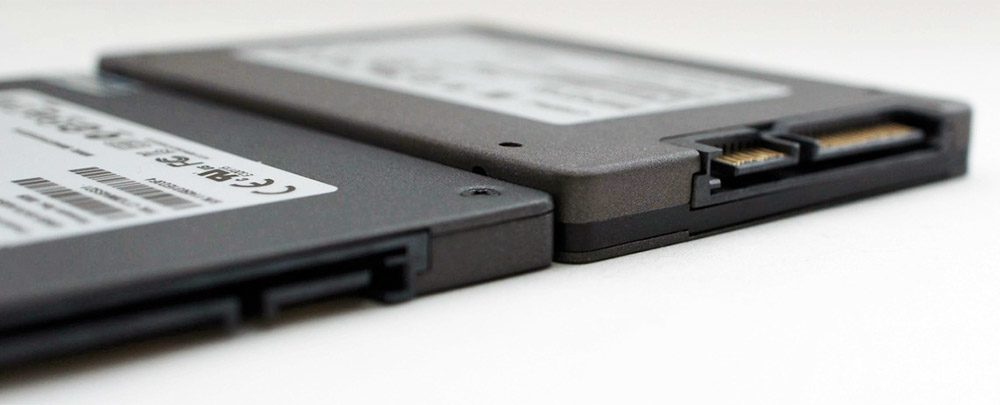
Before we start though, you’ll have to buy yourself a compatible SSD. Like I said, laptops come with 2.5″ inch HDDs, but there are two types of such drives out there: regular ones that are 9.5 mm thick, and slimmer ones that are 7 mm thick. A 7 mm SSD will fit inside a 9.5 mm compartment, but not the other way around. As a thumb rule though, it’s best to buy a 7 mm 2.5″ SSD, just to be sure.
Amazon and other shops have proper listings of the best-sold and most appreciated such drives and you can find reviews that will help you pick the right model for your needs and budget. All I can say is that I’m using Intel (310, 520, 530 series), Samsung (840 Pro Series) and Kingston (V300 series) SSDs myself and I’ve got nothing to complain about any of them. However, shopping for something based on brand alone is wrong, make sure to check out details on the exact models you’re interested in and read reviews. And if you have questions on a particular SSD, get in touch in the comment section at the end of the post.
Once you have your SSD, we can proceed.
There are two methods I’ve used when switching to an SSD.
Method 1 – Step 1
This method involves duplicating the content on the HDD already installed in your laptop onto the new SSD.
For that you’ll need to buy yourself an USB to SATA adapter, you’ll find plenty of good ones on Amazon for around $10-$15. Connect the SSD to the adapter and stick the other end into the laptop’s USB port.
Each SSD manufacturer will include an easy to use Disk Cloning tool. OCZ and Crucial give you a license of Acronis® True Image HD, Samsung and Intel have an app called Data Migration, or you can use a generic software like MacriumReflect, which is free. These apps will display the exact partitions on your HDD and allow to clone them on the new SSD. I only choose to clone the restore and Windows partitions, but you can clone all of them if you want to. In case the partitions on the HDD are larger than the space on the SSD (which is usually the case, since large capacity SSDs are very expensive), the software will allow to move only certain partitions or set up manually the size of each partition.
Once you’ve created your clone, it’s time to proceed and replace the HDD with the SSD. But more about that in the Step 2 chapter.
Method 2 – step 1
In this case you have to go to Microsoft’s website, download an ISO image of the exact same version of Windows you have on your laptop and create a bootable USB stick from that image. Microsoft has a simple tool for that, you’ll find it in here. You’ll of course need an USB stick.
Once that’s done, put the SSD inside your laptop (see step 2 below), connect the USB stick and boot from it, then install a fresh copy of Windows.
This method only works if you have access to the Windows Serial number (it should be on the laptop’s back or in the documentation) or if you’ve bought a retail version of Windows. If not, stick to method 1. At the same time, this method won’t move the restore partition from your HDD to the SSD and might require a bit more work to get the right drivers afterwards. But it allows you to get a completely clean version of Windows on your computer, without any of the bundled bloatware most manufacturers put in. That’s why I personally prefer this particular approach.
Update: As Rune mentioned in the comments, this method will probably not work with the newer laptops running Windows 8, 8.1 and later, because most of these no longer offer the serial-number (product key) anywhere in the box and it’s impossible to get it from Microsoft either. He was in contact with several MS technicians and they confirmed that. So for the newer laptops you might have to stick to method 1 only. Again, the problem is that you can’t get the serial number required when installing Windows from scratch and reactivating it. If you can find it, this method will work.
Both Methods – step 2
This is where you’ll actually replace the HDD with an SSD. Follow these steps.
- Turn OFF the laptop. Once it’s OFF, press and keep the power button pressed for 10 seconds.
- If the laptop has an easily removable battery, disconnect it.
- Now you’ll have to get access to the storage bay. For that you’ll need the screw driver and in some cases, the plastic knife. Some laptops might have a dedicated bay for HDD access, but the newer ultraportables don’t and require you to remove the entire back panel. Careful, some hide extra screws behind the rubber feet, aside from that ones that are easily visible.
- Put the laptop on a flat surface and put on your antistatic wristband or if you don’t have any, make sure to touch a grounded metallic object in your house to discharge any of that static electricity that could fry your components. This is serious, do it!
- Locate the HDD and unscrew its cradle. Disconnect and remove the HDD from its bay.
- Unscrew the HDD from the cradle and replace it with the SSD. If your laptop used a 9 mm HDD and your 7 mm SSD came with a special adapter in the pack for 9 mm bays, attach that adapter to the SSD. It’s usually a piece of plastic/foam with an adhesive part.
- Now its time to reverse the process. Screw the SSD to the cradle, put it back in its bay and connect it in place. Put the screws back and screw back the back plate, reattach the battery if needed and power on the laptop.
If you went with method 1, the laptop should start booting Windows.
If you went with method 2, you now have to install Windows from the previously made USB stick.
Wrap-up
That’s about it. Like I said before, this is a simple process, you just need to be a bit careful when actually replacing the HDD with the SSD.
Of course, things might not always work the way they should and here’s where the comments section comes in handy. So, if you have any questions or anything to add to this post, feel free to get in touch, I’ll be around to reply and help out.




Rune
February 6, 2015 at 10:55 am
Hello,
I just bought the Dell Inspiron 13 7000 7348 and a Crucial MX100 SSD 512 GB. I’m going for Method 2 and have bought a USB stick too. However, in attempting to download the file from Microsoft (from here – windows.microsoft.com/en-US/windows-8/create-reset-refresh-media) the download stalls at 78% consistently and regardless if I pick the ISO or USB version. I have attempted the download a few times before windows updating the OS and now after. I have formatted the USB stick to NTFS just in case the file size was to big for FAT32 to handle. Any hints on what to do?
Thanks.
Andrei Girbea
February 7, 2015 at 3:57 pm
Never happened to me. Maybe you can try it on another computer?
THIAGO
April 12, 2017 at 1:32 pm
Dude, i have the same Inspiron 7348 laptop and it's always freezing at widows logo when I try to install a new windows copy.
It's recognizing my new SSD and it's all set, unfortunately I can't make it work. Already installed this version of windows in my pc to try to Cheat with this bug but's it dosen't worked.
If anyone has a solution, plis, tell me.
Rune
February 8, 2015 at 2:26 am
No need to – but it might be worth mentioning that Method 2 only works if you have a retail version of windows. I my case with a Dell pre-installed that was the cause for the error and Microsoft does not mention it on their site where you download the iso file…
Even if you manage to dig out your windows product key it still will not work for you this was.
-so Method 2 is in theory a really good idea and for all practical purposes unusable unless you went and spent $ 120 on your windows copy in their retail version.
Thanks,
Rune
Andrei Girbea
February 8, 2015 at 11:14 am
I’ve used the second method on several different laptops that did not came with retail Windows. As long as you’re not changing you device’s motherboard, there’s no problem with this method, at least none that I’m aware of. You do need the Serial number though, then download the right Windows version from Microsoft’s website and proceed further.
Update: realized these older laptops were all running Windows 7 and had the serial number sticker somewhere on the back or in the box. That’s not the case with Windows 8.1 anymore, as Rune mentioned to me, so indeed the second method might not work on the newer computers.
Sem
June 25, 2016 at 12:11 pm
What if I can find my Windows Product Key (there some tools, that can be helpful), will I be able to install with the second method?
James
March 17, 2015 at 5:43 am
Andrei,
How do I upgrade a hybrid drive (HDD + SSD) to only SSD? Will the instructions above work for a hybrid drive replacement with SSD? I am currently interested in buying a laptop whose hard drive is 1TB 5400 RPM+ 8GB SSHD. Will I be able to follow these instructions and remove both 1TB 5400RPM and the 8GB SSHD and replace it with a 7mm 512GB SSD?
I would really appreciate if you can help with this.
Andrei Girbea
March 17, 2015 at 11:15 am
Which laptop? There’s a fair chance that 2.5 inch 1TB HDD is actually a SSHD that includes the small 8 GB SSD, so you’ll only have to remove it and put an SSD in its place./
Rune
March 17, 2015 at 1:42 pm
See comments after your questions below:
How do I upgrade a hybrid drive (HDD + SSD) to only SSD?
A: The same way.
Will the instructions above work for a hybrid drive replacement with SSD?
A: They worked for me – I replaced a hybrid with a full SSD.
I am currently interested in buying a laptop whose hard drive is 1TB 5400 RPM+ 8GB SSHD.
A: Ok ;-)
Will I be able to follow these instructions and remove both 1TB 5400RPM and the 8GB SSHD and replace it with a 7mm 512GB SSD?
A: If the physical size of the two drives are the same OR you are changing from a 9 mm to a 7 mm (where some manufacturers include a little 2 mm plastic bracket) you should be able to.
I would really appreciate if you can help with this.
A: I hope this helps – otherwise keep asking ;-)
Rune
James
March 18, 2015 at 12:51 am
Thanks Andrei and Rune. You guys are really really helpful. By the way, I am planning to buy the following laptop (see link below):
shop.lenovo.com/us/en/laptops/lenovo/z-series/z70-80/?sb=:000001C9:000142E1:
It looks like a gaming laptop but I don’t need it for gaming. I need a laptop whose specs will remain strong for 3-5 years. I have heavy use of excel spreadsheets with advanced formulas and hundreds and thousands of lines so I need a powerful computer.
Please let me know your thoughts and thanks again for your help.
James
March 18, 2015 at 4:59 am
Hi Andrei and Rune,
I need your advice on something. I am torn between the below two laptops. I will not use it everyday but when I do use it, I will need it for heavy excel usage with usually 8-10 files open at once and with thousands of rows and advanced formula calculations. So I need a laptop that can handle those tasks quickly and efficiently. My teenage son wants a laptop for gaming as well so I was thinking he could use the laptop too.
Which one of the two would you guys recommend in this price range (under $1,200) that will accomplish both needs?
1. Lenovo Y50 $1,099. Screen Size 15.6″, Intel i7 4th generation, 16GB RAM, NVidea GeForce GTX 860M 4GB Video Card, and 512SSD.
2. Lenovo Z70 $899. Screen Size 17.3″, Intel i7 5th generation, 16GB RAM, NVidea GeForce 840M 2GB Video Card, and 1TB 5400 RPM+ 8GB SSHD (which I plan to replace it with a 512GB SSD that will cost $200).
Andrei Girbea
March 18, 2015 at 9:59 am
The Y50 is the better pick here, unless you really want the larger screen of the Z70, and overall a good laptop for the money. I’ve read complains about its screen though, it’s most of the time a TN panel with rather poor contrast and viewing angles. You could also consider the 15 inch Acer Aspire V 15 Nitro Black. It doesn’t have the graphics power of the Y50, but it’s more compact and packs a better screen.
James
March 18, 2015 at 3:41 pm
Thanks Andrei. What about the processor? Is 5th generation really that much better than the 4th generation? Will the 4th generation i7 processor be just as good?
Also, regarding the screen issue of Y50 related to TN panel with poor contrast, how serious is this issue? I have read overall good reviews for Y50. Is the screen issue a noticeable difference that affects all Y50 laptops? I am really leaning towards Y50 at this time so please shed some more light. Thanks.
Andrei Girbea
March 18, 2015 at 11:07 pm
I have some posts on the new 5th gen processors, you should look them up on the site.
Well, the screen can be alright or simply unacceptable, based on what you’re already used to. If you’d be coming from a laptop with a high-res IPS display, you’d probably hate the one on the Y50. If not, it’s going to be alright. You’ll have to be the judge of that yourself…
James
March 20, 2015 at 7:56 am
Guys,
I have found a laptop that I like. Do you guys have any thoughts on this? Do you recommend it? It’s a Sager laptop and I will upgrade RAM to 16GB.
Here is the link:
xoticpc.com/sager-np8268s-clevo-p150sma-p-6987.html?wconfigure=yes
Please advise. Thanks.
ap
June 4, 2016 at 6:02 pm
Windows 8 key:
Go to Control Panel>System>
you should find your windows activation product key there