Table of Contents
Most computers are configured for the lowest-common denominator user out of the box so that both grandpa and junior will be able to do what they want without complaint. But if you’re a power user, gamer, or road-warrior, there are many ways to improve the performance and functionality of your computer to make you more productive.
Do you want faster CPU performance? Faster GPU performance? Better battery life? Quieter fans? Lower temperatures? I can’t promise all of those at once, but if you follow this guide, you’ll be able make your ultrabook at least a little—or maybe a lot—better in the ways that matter most to you.
On my QHD+ Razer Blade 2015, these tweaks have increased my battery life from 4 hours to 6, increased my 3dmark11 score by about 10%, and reduced thermals and noise emissions.
The first part of this guide will deal with risk-free, basic tweaks for performance or battery life. The second part of this guide will deal with more advanced (but potentially more rewarding) tweaks involving undervolting and overclocking. If you are squeamish about tinkering and a little trial and error with your PC, then stick with the first section for the basics. If you are a power user and want to get the absolute most out of your ultrabook, don’t miss the advanced section.
Part 1: Basic Tweaks
Let’s get through the basics first. Windows, especially Windows 10, has a fair amount of built-in options allowing some moderately effective tweaks for performance and battery life.
If you are using Windows 10, turn on battery saver and use it to pinpoint resource hogs.
As our computers and smartphones become more similar, more and more apps like to run in the background and constantly update.
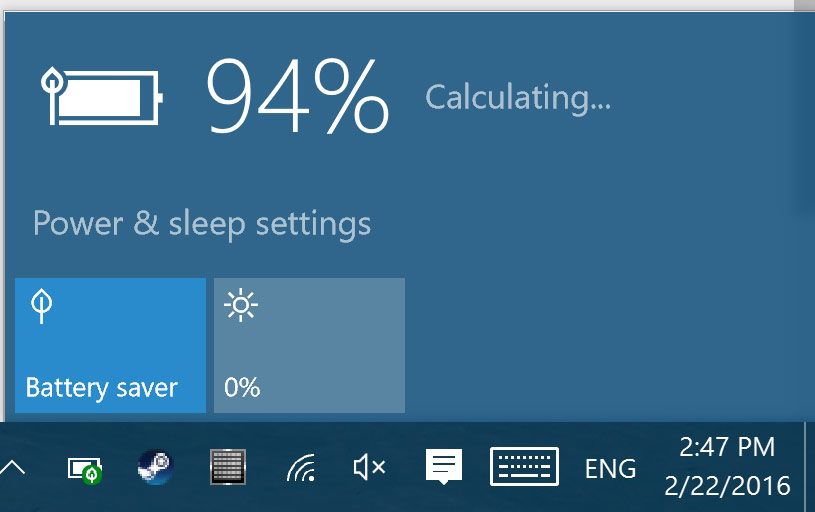
In settings > system > battery saver > battery saver settings, there is also an option to check battery usage by app. This helpful feature, similar to the battery stats on your phone, tells which apps have been using the most juice. For example, my chart tells me that Chrome has used 30 percent of my battery over the last 24 hours. Chrome, especially with a few plugins, is known to be quite a resource hog, so when power outlets are limited, consider working in Edge instead.
There is also an option to turn battery saver on automatically only once the battery goes below a certain charge. You can set this if you like, but again, I feel that it’s just not necessary to have those background programs allowed to eat my battery and data while unplugged at all.
Take your time to tweak your power options
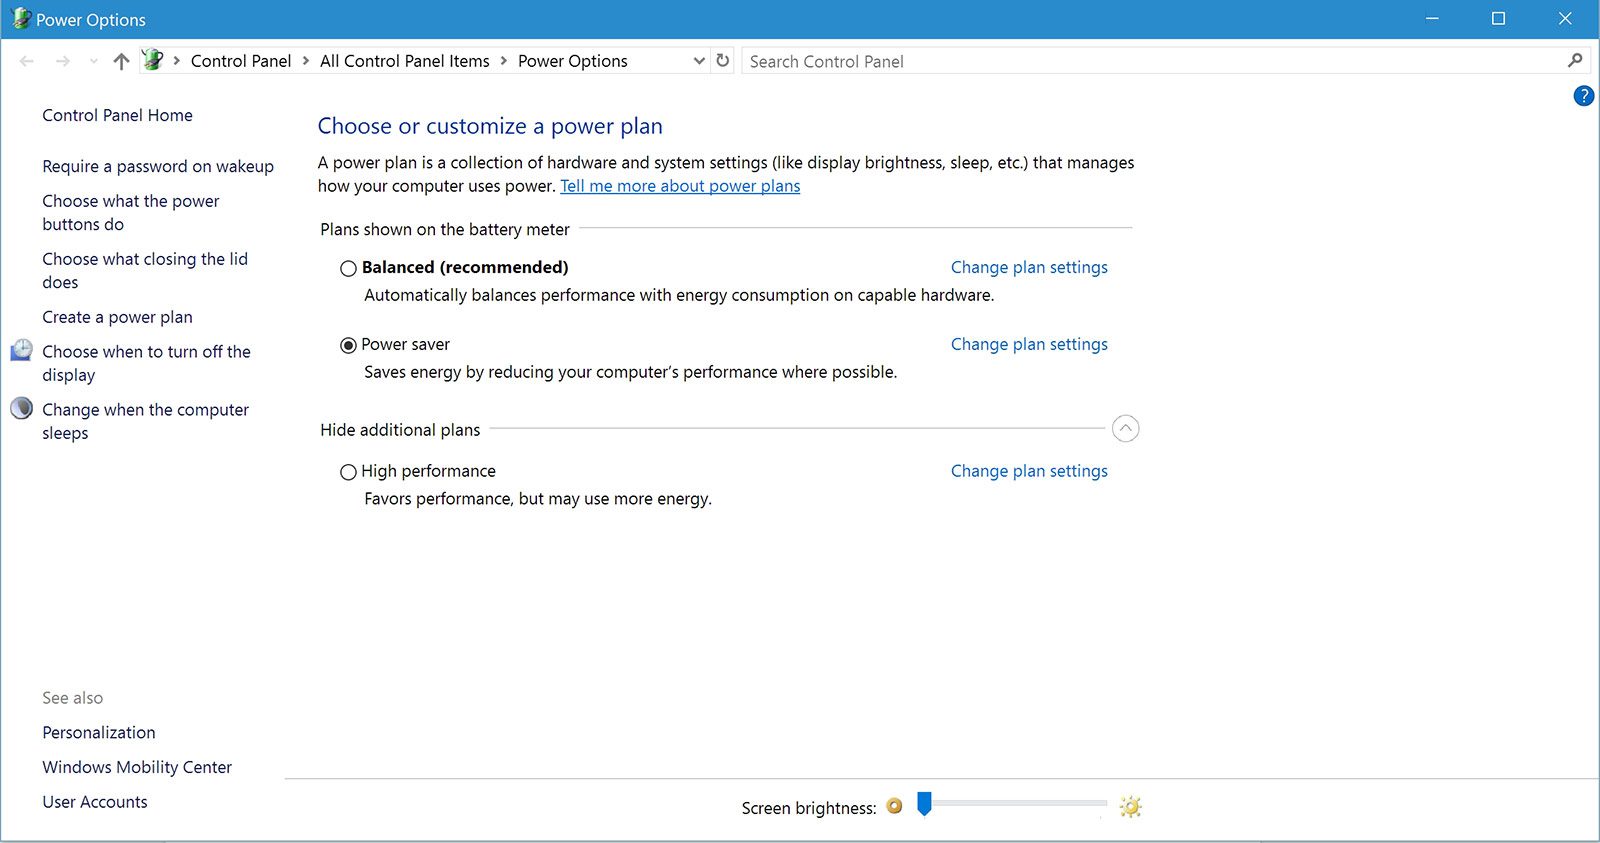
Right click your battery icon and go to power options. Note that this is still not fully integrated with the metro UI and is separate from the main Windows 10 settings panel.
This shortcut opens the main Power Options window, seen below.
What I like to do is use a single profile but then edit the plugged-in/battery plans themselves. On the main screen are the display/sleep timers. If you really need maximum runtime, you can set the display to turn off quickly after about 2 minutes on battery. If you find it annoying or you do a lot of reading, you probably want to set this for longer. The real meat here is in the “advanced power settings”.
Back in the day, I always used “high performance” because I had a 933MHz Celeron, but today’s processors are powerful enough that you won’t feel any lag doing nearly any sort of productivity task. Generally, unless you’re playing The Witcher 3 unplugged, stick with the power-saving options.
I’ll go through some of the most important options here:
- Desktop Background Settings > Slide Show
Pause it for battery, make available for plugged in. This wastes memory and CPU cycles while on battery—there’s really no reason to keep it running. If you’re that tired of seeing your desktop picture, then right-click it and go to the next picture of scantily-clad crab-girls (or whatever you kids are into these days, I’m not judging) manually.
- Wireless Adapter Settings > Power Saving Mode
Set to “Maximum Power Saving” for battery, “Maximum Performance” while plugged in. I have never noticed a difference between “moderate” and “maximum” power saving modes in performance, so unless you’re having issues with your wifi connectivity, set it to max power saving to get some extra minutes on WiFi.
- Sleep > Sleep after
This one is up to your taste and your workflow. If you frequently get pulled away from your computer and don’t know when you’ll be back, it’s a good idea to set this to a low value. I keep mine at 10 minutes on battery, 15 minutes when plugged in. Modern laptops with SSDs and instant-on features don’t take more than 1-2 seconds to turn back on, so I am pretty liberal with allowing my computer to sleep.
- Sleep > Hibernate after
Because modern computers can boot so quickly, it’s not as much of a pain to shut down/power on your PC as it used to be. Hibernation saves the full workspace and RAM content to disk and then, voila, reloads it all in seconds. It takes a bit longer than waking from sleep, but the advantage is that hibernation uses nearly zero battery whereas sleep will trickle your battery down at least a couple percent per hour.
I think 180 minutes or less is a good time to set your laptop to hibernate after. After all, you don’t want your computer leaking power all day in your carry-on and end up with only 20% left when you get an 8-hour delay at Ninoy Aquino Airport.
- Intel Graphics Settings
On battery: “Maximum Battery Life”. Plugged in, maximum performance. Integrated GPUs are probably not going to be driving your Witcher 3 sessions, so I don’t see a practical purpose to giving the iGPU more power than the minimum.
- PCI Express > Link State Power Management
This is a setting which has quite an impact on both performance and battery life. What it does is sleep the PCI connected device links while not in use. Maximum power saving has the highest wake latency, but the most power savings. It has a direct effect on performance and power draw especially while gaming. Unless you play a lot of intensive games while unplugged, set this to “Maximum power savings” when on battery. Getting 60 fps constant isn’t that important when you only get 60 seconds of game time on battery. Keeping this OFF when plugged in will allow your GPU/CPU to run at maximum speed when under load. If you ever have problems with your GPU not operating at its max clock speeds despite load, it’s often related to Link State Power Management being enabled.
- Processor power management > Minimum processor state
Set this to 5% for both plugged in and battery. Letting the CPU idle when not under load will reduce power consumption and heat. There is no performance advantage to forcing the minimum CPU state to 100% (disallowing the CPU to ever downclock).
- Processor power management > System cooling policy
A passive cooling policy means that rather than turn on the fans to cool the computer it will simply downclock. An active cooling policy means that the components will run at full power but the fans will be responsible for reducing the temperatures. Plugged in, unless you’re next to a sleeping demonic clown who wakes up at the sound of a fan, set this to “active”. I highly recommend settings this to “passive” on battery, because first, the performance hit isn’t noticeable, but second, active cooling on the laptop is a triple threat to efficiency: the fans use extra power, they make an annoying noise, and your processor will be clocked higher and using more power as well. For better battery life, quieter emissions, and lower thermals, set this to passive.
- Processor power management > Maximum processor state
Most people should set these to 100% for both battery and AC. Setting the maximum state to 99% will, in theory, disable the turbo clock speeds of your CPU. This can be useful with systems that overheat and thermally throttle. This specific issue and how to best handle it will be discussed in depth in the advanced section of this guide.
- Display > Enable adaptive brightness
Disable this. The sensors and the adjustments they make both waste power and can be annoying.
Disable Unneeded Background Programs
Press Control-Alt-Delete.
Click “task manager”. If your computer is idling at anything over 3%, chances are there are some poorly-written rogue programs eating your CPU cycles and battery power. This will depend on the machine, but take a good, long look at any processes running that are hogging CPU time. Axe them if you can.
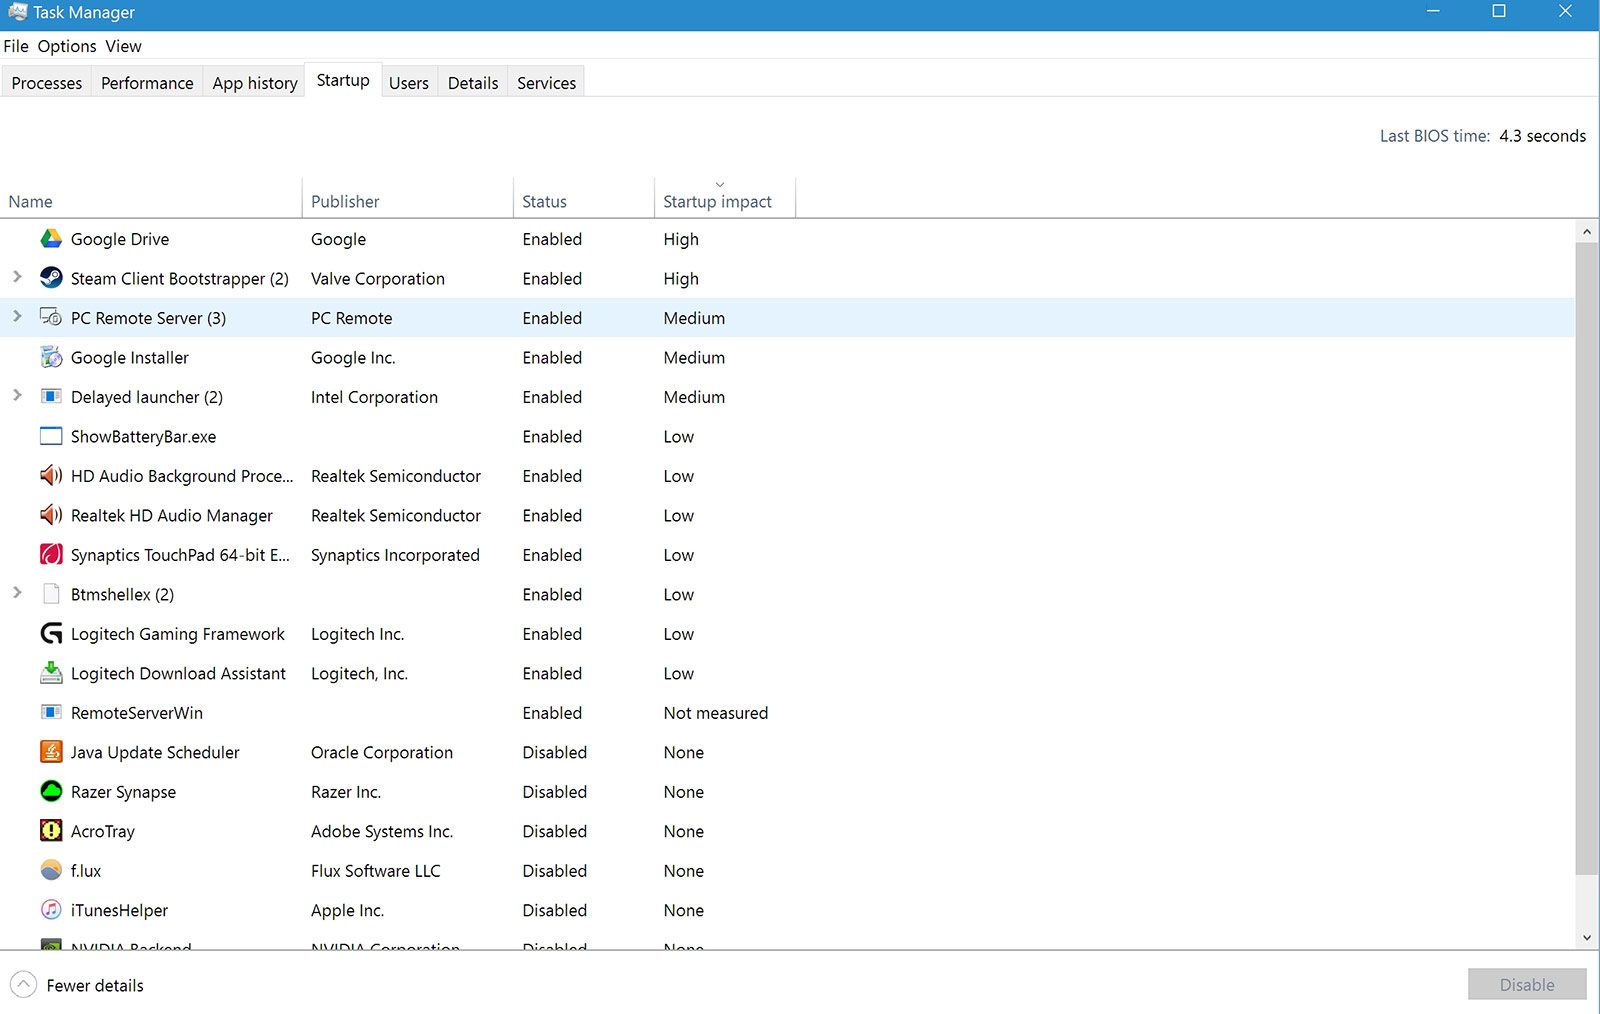
Go to the startup tab of the task manager as well, and take a look at the programs set to start with your computer.
Anything unessential here should be disabled. Apple helper? Adobe updater? Notavirus.exe? Terminate with extreme prejudice.
Free up disk space
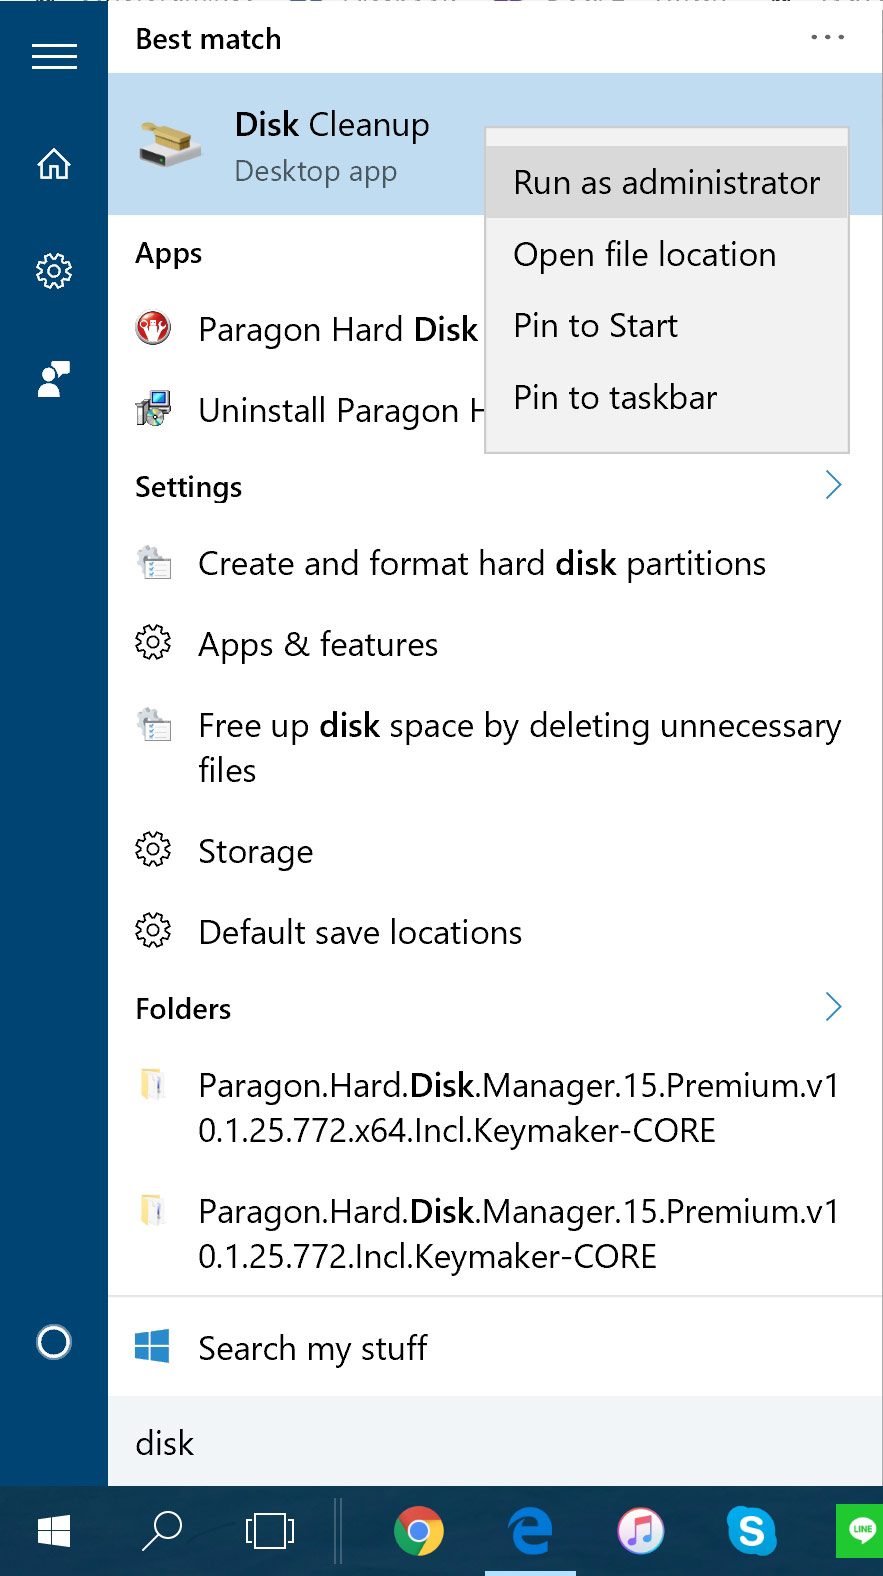
SSDs are the future, but they’re also small like it’s 2005: storage space comes at more of a premium than with the 5400 rpm HDDs of days past. Go to the start menu and type in “disk cleanup”.
Right-click and select “run as administrator”. This is critical because it will enable the most important function of disk cleanup: the ability to clean up upgrade and Windows installation files. If you haven’t done this since upgrading to Windows 10, you may many gigabytes of temporary update or Windows.old files lying around. Get zem! Schnell!
Configure NVIDIA optimus
Many laptops these days have a dedicated GPU. This is great for high performance when plugged in, but you do NOT want this GPU to be on when you don’t need it.
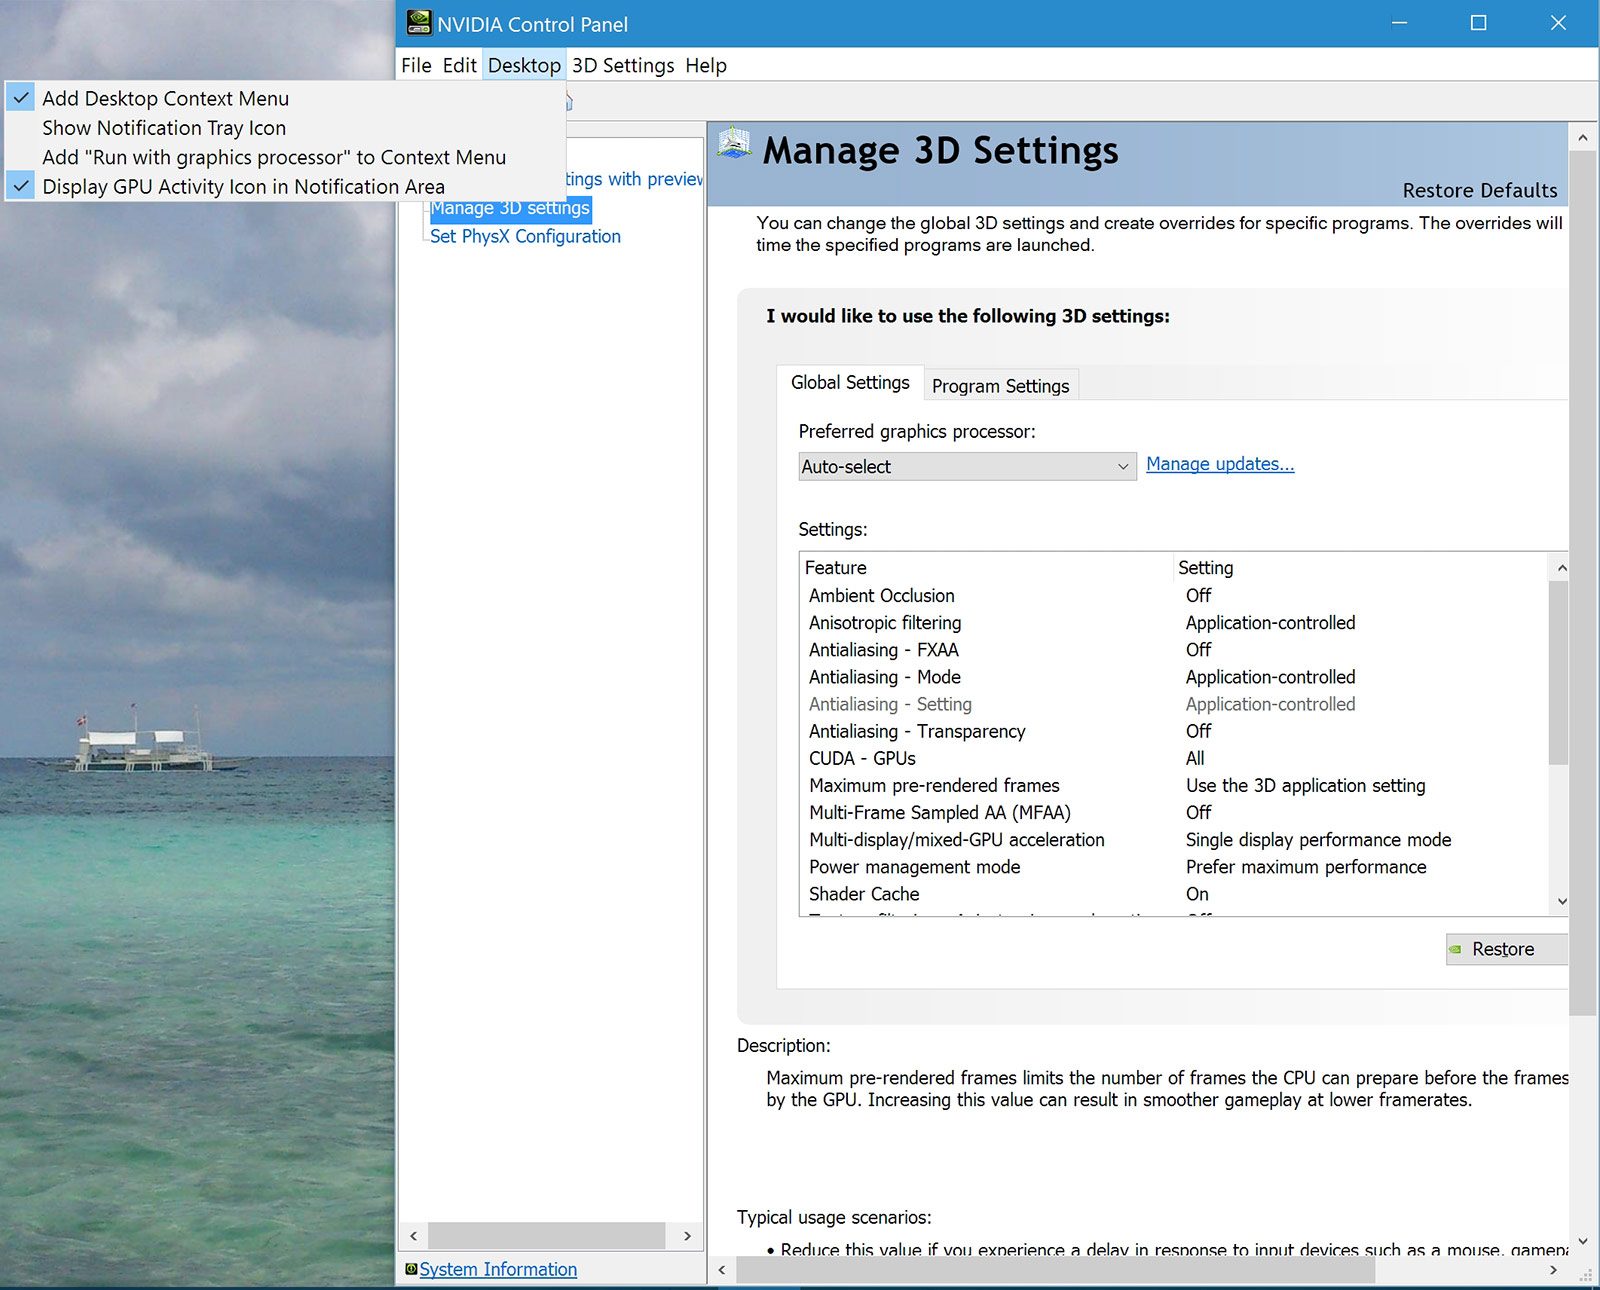
Why? The most power-hungry mobile CPUs, such as a Core i7 HQ, use up to about 45W of power. In comparison, a modern core M uses 4.5W, and a U-series uses 15W. A GeForce 970M will guzzle up to 81W. To make sure that your GPU isn’t being used needlessly, right-click the desktop and go to the NVIDIA Control Panel.
Change the preferred graphics processor to “auto-select”. You don’t need to select the integrated GPU generally, because it is nearly always used by default. However, to make sure that your GPU is not being used by a rogue program, click the “Desktop” menu at the top of the control panel and check the option to “Display GPU Activity Icon in Notification Area”.
If your GPU is being used, the chip icon will light up. By clicking on the icon, you will then be able to see what culprit program is waking up your power-hungry GPU, and you can deal with it accordingly (make a profile in the NVIDIA control panel that forces that application to use the integrated GPU, or just disable/uninstall it).
And hey, while you’ve got the 3D settings window open, go and make sure that the GPU is set to “prefer maximum performance”. This will ensure that while gaming, your dedicated GPU will try to maintain its highest clocks.
Use airplane mode if you’re offline
If you aren’t using it, turn it off! Disabling Bluetooth and WiFi when not needed can give you hours more time on battery. This is a small thing that people often forget, but it makes a big difference.
This concludes the basic section of this tweaking guide. The next section of the guide will discuss more technical tweaks that make use of powerful third-party software, such as ThrottleStop and Nvidia Inspector, to increase raw performance and decrease heat emissions and power usage.









Commentator7
July 5, 2017 at 5:34 pm
If you use a Chromium/Blink-based browser (that tend to eat up cpu/battery and also cause heat), try the Battery Saver in Opera browser. Note that you will have to manually enable it if every time you wish to keep using it also after pluggin in power. So it might not be for you if you plug in/out more than 5 times per day.
Alex
December 23, 2018 at 12:08 am
What does the Intel Graphics Settings within the Power Options actually accomplish? Because there's a separate application provided by Intel that controls various graphics settings, including power options. (You know, it's the one that is typically in your System Tray.) For example, that application is the one that controls whether your screen will do automatic dimming/brightening depending on what's being displayed (which I hate, btw, and always turn off). If I configure power settings within the Intel application, does changing the Windows-based Intel Graphics Settings accomplish something on top of/separate from whatever it is that the Intel application does??
Douglas Black
December 23, 2018 at 7:31 am
I believe they change the same settings found in the Intel app.
Alex
December 24, 2018 at 10:27 pm
To let you know, there's a small typo in the sentence right before the "Configure NVIDIA Optimus" section. It's missing a verb, such as, "*have* many gigabytes…"